Learn how to warp vocals and acapellas in Ableton Live. These warping techniques show you how to time-stretch audio without a fixed beat.
Warping Audio in Ableton Live
Ableton Live‘s warping capabilities allow you to time-stretch audio, so it stays in sync with a chosen tempo. Live’s ability to play any audio sample in sync with the tempo is a versatile feature.
Warping also gives you the ability to manipulate audio in exciting ways. For example, you can change the rhythmic flow of a sample, or even move notes to other positions. Warping is also excellent for beatmatching, remixing, sampling, sound design, and other creative reasons.
Ableton Live Warp Modes
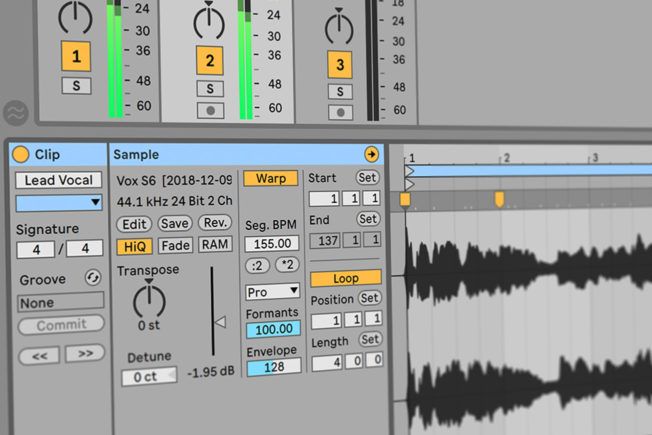
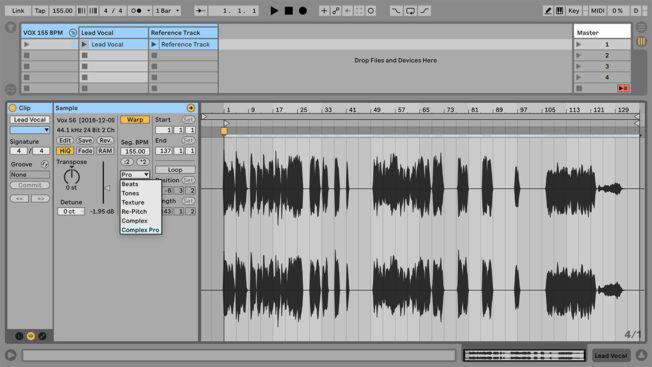
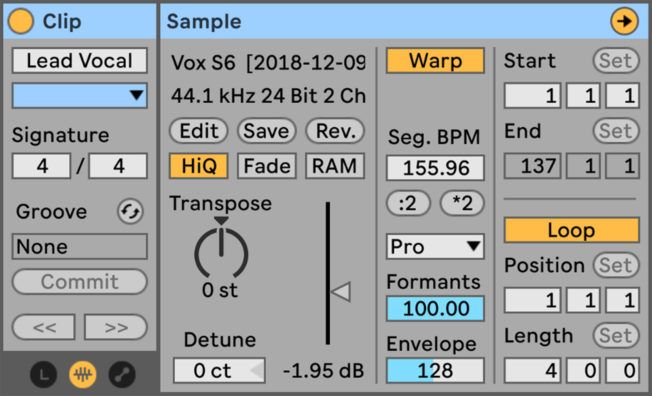
Live offers six time-stretching modes to accommodate different audio material. Choose the warp mode that best suits your audio source. You can set the time-stretching mode and adjust the associated controls from the Clip View Sample Box.
Here are the six warp modes:
- Beats Mode works best for material where rhythm is dominant. For example, anything with sharp transients like drum and percussion loops.
- Tones Mode works best for stretching material with a distinct pitch. For example, vocals, bass lines, and monophonic instruments.
- Texture Mode works well for textured sounds without a distinct pitch. For example, noise, atmospheric pads, or polyphonic material.
- Re-Pitch Mode will keep the audio in sync with the tempo. However, the pitch will change as you speed up or slow down the tempo. For example, increasing the tempo makes the audio play faster, while decreasing the tempo makes it play slower.
- Complex Mode works best for multitrack mixes, layered sounds, and anything else with a lot of character. For example, it works well for warping entire songs that contain beats, tones, and textures.
- Complex Pro Mode offers better results than Complex Mode. However, it increases CPU usage. It also works well with polyphonic textures, full songs, and vocals.
How to Prepare Vocals for Warping
By default, Ableton Live will auto-warp audio samples loaded into your project. Auto-warping short samples like drum loops is helpful. However, auto-warping long samples like full songs and vocals cause problems. For example, you won’t get accurate results if the material has an intro without a defined beat or with a tempo that fluctuates. Auto-warping long samples and vocals also cause sound quality and timing issues.
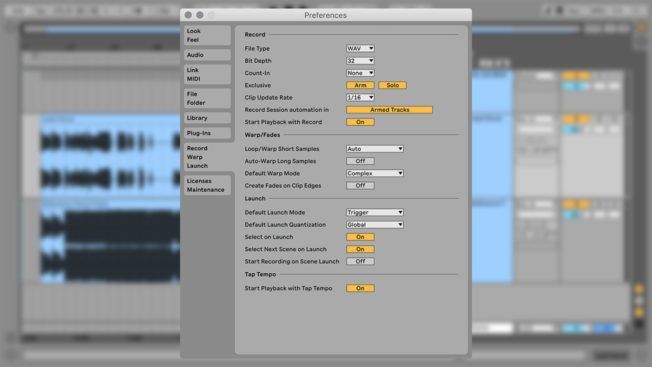
It’s common practice to disable the ‘Auto-Warp Long Samples’ feature from the ‘Record Warp Launch’ tab in Live’s Preferences. Disabling this feature gives you the freedom to warp tracks manually. It also reduces the hassle of fixing the warp markers Live automatically placed.
It’s also a common practice to disable the ‘Create Analysis Files’ feature from Live’s Preferences. An analysis file contains all your warp settings and other data about the sample. Manually saving this file ensures Live loads the correct warp settings every time you drop in the sample. After warping, click the Clip View’s Save button to store the current warp settings with the clip’s analysis file.
How to Warp Vocals in Ableton Live
Ableton Live can warp various types of material. For example, vocals, multiple tracks, tracks with a drifting tempo, short and long samples, etc. This guide looks at warping vocals or acapellas without a fixed tempo.
Warping vocals and acapellas is difficult because there’s not a rhythmic reference like drums. It’s hard to determine the first beat and align it to the grid. Vocal recordings can also have a drifting tempo. The challenge is finding a downbeat and stretching the vocal to sync with the tempo without sacrificing audio quality.
Here are the steps for warping vocals in Ableton Live:
1. Determine the Tempo
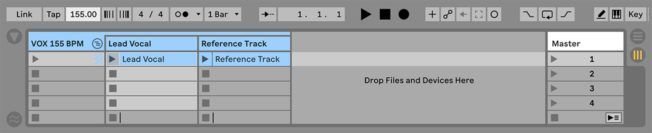
The warping process is easier when you know the vocals original tempo. Find the tempo of a vocal by looking it up on the internet, using a BPM analysis tool like Mixed in Key Studio Edition , or with Live’s Tap Tempo feature. For example, click the Tap Tempo button once every beat to determine the tempo if you have the original vocal track.
Last, change the project tempo to the vocals original BPM before warping. Preparing your vocal before activating Live’s Warp feature will make the process easier. You won’t have to delete several misplaced Warp Makers.
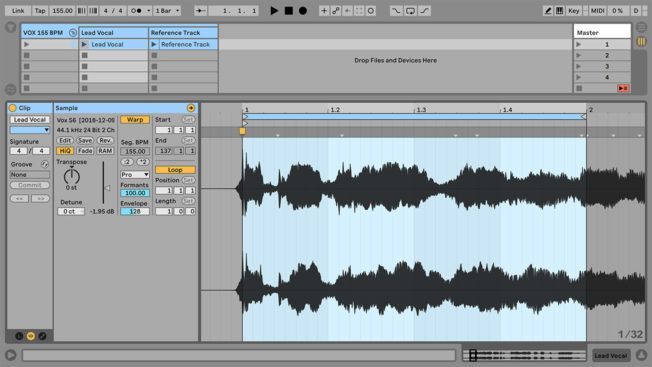
2. Locate the First Downbeat
Activate the Warp button from the Clip View Sample Box to enable warping. Then, zoom into the sample and listen for the first prominent downbeat. For example, the first word that plays on the downbeat of the bar. If the vocal has an intro without defined words, then find the first word that occurs after the intro.
If you’re having difficulty finding the word that lands on the downbeat, check the original song to hear how the vocals align on the beat. Also, the first word is not always the word that lands on the downbeat. Some vocal recordings’ downbeat start a few words into the phrase. Use your ears and count if needed.
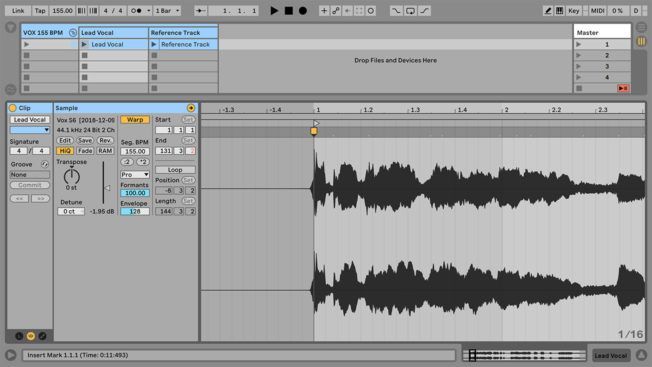
Next, place the cursor where the initial transient crosses the zero-crossing line and then double-click to create a Warp Marker.
3. Set 1.1.1 Here
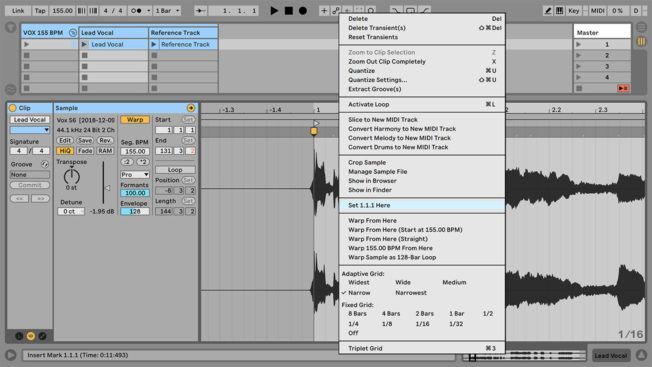
Right-click the Warp Maker you just created and select ‘Set 1.1.1 Here’ from the context menu. This step sets the starting point where Live will begin warping.
Holding Shift while dragging the Warp Marker will move the waveform beneath the marker to make further adjustments.
4. Warp XXX BPM From Here

Live offers four ‘Warp From Here’ commands from the context menu. The command that works great for vocal samples with a consistent tempo is ‘Warp XXX BPM From Here.’
Right-click the new Warp Marker and choose ‘Warp XXX BPM From Here’ from the context menu if you know the original tempo.
5. Choose the Best Warp Mode
Select the best sounding Warp Mode for your vocals from the Warp Mode chooser. Complex and Complex Pro will give you the best time-stretching quality for vocals.
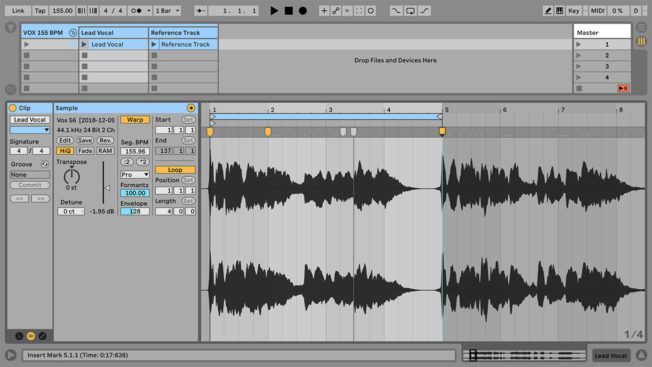
6. Check the Results
First, visually scan the vocal waveform to see if the sections align on the grid. You can also set an 8-bar loop brace and then move it along the timeline to examine the waveform.
Second, activate Live’s metronome to hear if the vocal warped correctly and plays in sync with the tempo.
7. Make Adjustments
Manually add Warp Markers where needed and make adjustments if the vocal drifts off tempo. Holding Shift while clicking on a pseudo Warp Marker allows you to drag the transient to a new position.
8. Save Default Clip Settings
Click the ‘Save Default Clip’ button to save the current warp settings. Live will then restore the saved clip settings whenever you drop the sample into a Live Set.
Conclusion
The warping techniques outlined in this guide work best for vocal recordings without a fixed beat. The process is essential for creating a vocal track, remix, or performing live.
Turn your passion for music into a Profession: Learn more about our Music School Programs!
MORE ARTICLES FROM THE ICON BLOG


FIND YOUR SOUND, HONE YOUR CRAFT:
Are you ready to turn music into a career? ICON prepares students to become music producers, composers, performers, recording artists, professional DJs, and entrepreneurs in the entertainment industry. Click below to get information about our award-winning programs: