What is multiband compression, and why should you use it? This guide looks at five ways multiband compression can improve your mix.
Understanding Multiband Compression
What is multiband compression? Why do we need it? Is it better than our good old friend standard compression? Explore the ways multiband compression can make your tracks sound outstanding. Learn what a multiband compressor is and the various ways you can use it.
Dynamics play a significant role in music. Knowing how to control and shape dynamics is crucial. And compressors are the essential tools used to treat dynamics. However, standard compressors can be limiting (pun intended) compared to the other dynamics processing tools.
This guide introduces you to multiband compression. It also offers tips on how to treat various sounds with multiband compressors.
Audio Compression Basics
Compression is the act of reducing the dynamic range of an audio source to make the average volume louder. Dynamic range is the difference between the loudest and quietest levels of an audio signal. Compressors make sounds louder by reducing the loudest levels and amplifying the quietest levels. Compression can also shape sounds, change their tone, and control transients. A compressor’s main controls include:
- Threshold: Sets the dB level where an audio source has to exceed for the compressor to activate. Any signal that passes above the threshold gets compressed.
- Ratio: The amount of gain reduction the compressor applies when the signal passes the threshold.
- Attack: The time it takes for compression to kick in once the signal passes the threshold.
- Release: The time it takes for compression to stop once the signal falls below the threshold.
What is Multiband Compression?
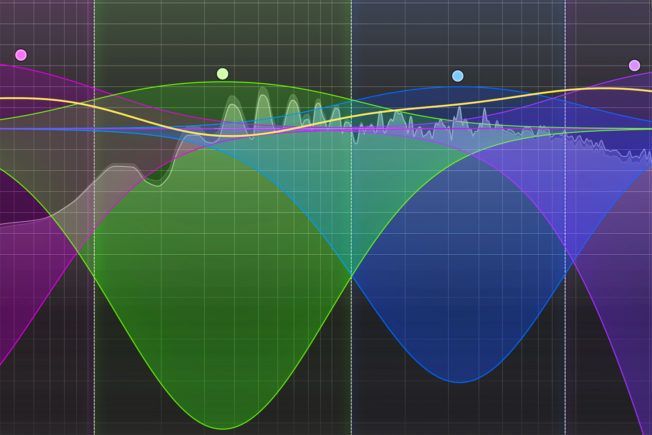
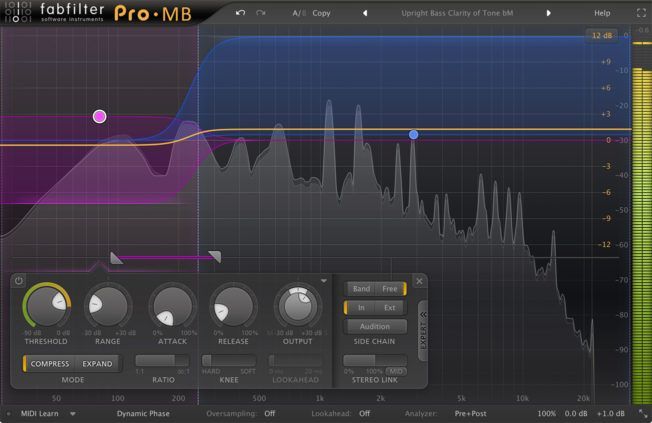
Multiband compression is a more advanced form of compression. A multiband compressor splits the frequency spectrum into separate bands. Each frequency band also has dedicated compression settings. Applying different amounts of compression to the separate frequency ranges gives you more control. A multiband compressor is essentially an EQ and a compressor in one.
Why Use Multiband Compression?
Multiband compression is more flexible than standard single-band compression. The results sound more natural and transparent. You also have greater control over shaping and managing dynamics. For instance, standard compressors affect the entire frequency spectrum of an audio signal. Whereas multiband compressors enable you to treat specific frequency ranges of an audio signal. For example, you can compress the low frequencies while preserving the high frequencies, or vice versa.
Another example: Say the top end on your snare is too harsh but standard compression causes it to lose punch. For this reason, multiband compression will work better. You can compress the high-frequency band more than the mid and low bands. In turn, the top end will sound less harsh and dynamic. You’ll also preserve the snares punch because the mid and low bands will have less compression. It’s kind of the ultimate sculpting technique for your audio.
The benefits of multiband compression are endless. There’s a reason top producers and audio engineers use multiband compression to get the sound they want. So let’s look at five examples where multiband compression can improve your mix.
1. Multiband Compression on Your Drum Bus
If you’re not using multiband compression on your final drum bus, you might be missing out. Treating your drum bus with multiband compression is a great way to glue all the drum elements, balance frequencies, and add excitement.
No two drums are alike, so be careful when applying the same amounts of compression across all your drums. Sure I like to use Live’s Glue Compressor as the first effect on my drum bus. However, when it comes to controlling dynamics, I use Waves C4 Multiband Compressor Plugin.
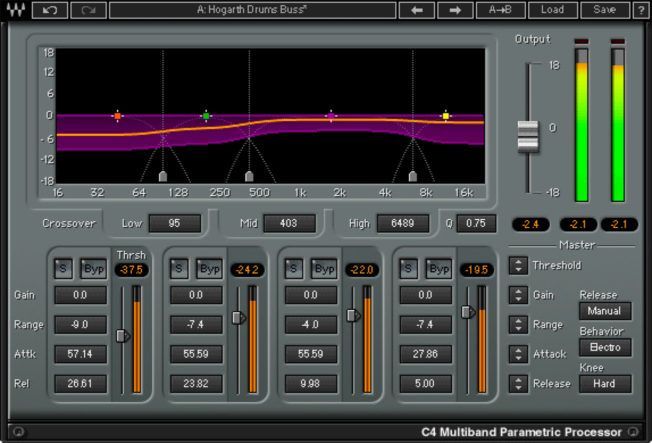
For example, you can hit the low-end hard with compression without affecting the high-end every time the kick hits. With a single-band compressor, if you increase the kick level, the top-end could become too loud and compete with other elements in the mix.
Furthermore, how you apply multiband compression depends on your song and how you want your drums to sound. For example, I love nice and punchy drums. I start by setting a fast attack and a slower release on the higher bands where my cymbals and hats sit. Sounds in this higher range can tire the listener’s ear when they’re too loud. So, aggressive compression here can be beneficial.
Next, I move to the midrange frequencies where my kick and snare sit. I want to hear that punch, so I’ll apply aggressive compression. However, I would set a slower attack to let the snare’s initial transient punch through before getting compressed.
Last, I’ll treat the low-end with small amounts of compression if needed. For instance, most electronic kicks are full enough and may not need processing. However, a live recorded kick would benefit from compression. Compressing its low-end will beef it up and give it more impact in the mix.
2. Mixing Vocals with Multiband Compression
Mixing vocals can be tricky. No two vocalists are alike. Vocal performances are also very dynamic, making it hard to get them to sit in the mix. For this reason, multiband compression works excellent at shaping and controlling vocals.
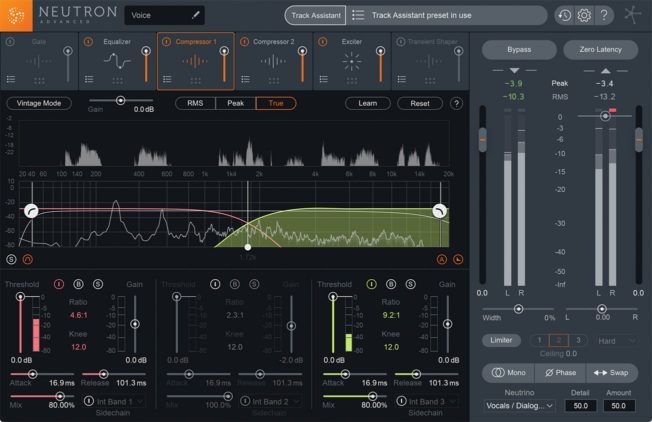
For example, you can compress specific frequency ranges to shape a vocal performance as a singer goes through different registers. You can also use multiband compression when elements in the same frequency range are clashing. For example, say you have a female vocalist with a high voice that gets masked by your synths. Raising and lowering the volume throughout your vocal track to get it to sit in the mix is a pain. Instead, let a multiband compressor do the work for you. For instance, boost the vocal top end with a medium attack and a medium-fast release. Then boost the gain to make her voice louder than the top end of your synths. This way you’re affecting only the masked frequencies and not the entire vocal.
3. Multiband Compression and OTT on Synth Groups
Multiband compression does a great job at gluing groups of sounds together and balancing levels. For example, apply multiband compression on synth stacks or various instrument layers to make them sound unified and cohesive. Unlike standard compression, multiband compression also has more control of handling a full-spectrum sound. Let’s look at a specific technique using OTT compression.
If you’ve been in the producing/mixing game for any amount of time, I’m sure you’ve heard of the infamous OTT. At this point, it is almost a cliché to use it according to some. However, I find it to be a fantastic tool.
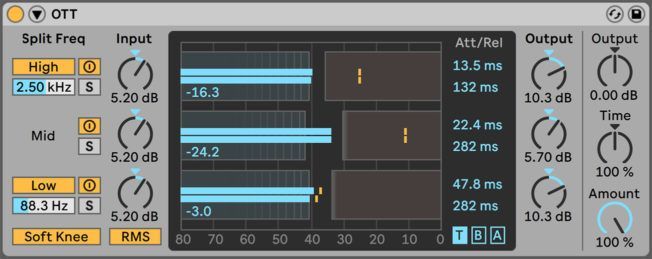
If you’re not familiar with this name, the multiband compressor in Ableton Live has a preset called OTT (over the top). This style of multiband compression combines upward expansion and downward compression to squash a signal. It does this on three different bands.
Moreover, the OTT does an excellent job at gelling synth groups, brightening up the top end, and adding excitement. However, be careful when putting this preset on your group. OTT will make things LOUD and brings various harmonics to the forefront of your mix. In addition to squashing synths dynamics, OTT also brings up all your reverbs and delays. In turn, this move makes those elements sound like synth layers of their own. It’s an exciting technique!
4. Mixing Bass with Multiband Compression
The low end can make or break your mix. It’s crucial to get your kick and bass correlating with each other. You can control kick and bass relationships with sidechaining and levels. But at a certain point, you may need a multiband compressor to take over.
Multiband compression works great at tightening low frequencies, reducing boom, and adding power. Treating the low-end with a dedicated band also allows you to apply heavy compression without affecting the midrange frequencies, which carry the attack of the sound. This move is vital when you want a consistent low-end level and a dynamic midrange.
Multiband compression will also bring cohesiveness to your mix and allow you to tighten up the low-end. For example, group your kick and bass and compress everything below 100 Hz. Be aggressive, try 6-10 dB of gain reduction and apply makeup gain to match levels. Also, pay attention to your attack and release times. Faster attack times can cause the kick to lose punch. Using a multiband compressor on your master is another place to achieve this technique.
5. Mastering with Multiband Compression
Using multiband compression on your master bus for the mastering process is also beneficial. I like to set slower attack times, faster release times, and small amounts of compression on each band. 1-3 dB of gain reduction is sufficient.

The mid band around 500 Hz to 2 kHz is where a lot of a songs body lies. Applying some light compression in this frequency range adds body and gives my tracks power. I tend to set medium to slow attack times, fast release times, and a 2-3 dB gain boost. The result tightens the mid-range, beefs it up, and adds level.
Adding gain to the different bands can also help you sculpt your sound. For example, apply compression to get everything under control, then boost and reduce levels where needed. This move works better than boosting with an EQ because compression is controlling your dynamics first. You’ll be able to get more gain in a controlled way.
Also, anything you do on your master can drastically change the overall sound of your song, so be careful. Minor moves on the master go a long way!
Conclusion
Multiband compression is a simple tool that can seem daunting. But once you figure it out, a whole new world to mixing opens. Learning how to use multiband compression will also help get your tracks to a professional level. You can preserve dynamics and sculpt your sound, unlike any other audio effect. While standard compression can help get the job done, multiband compression will excel when you want to get specific. Remember though, always use your ears first before trying anything.

Turn your passion for music into a Profession: Learn more about our Music School Programs!
MORE ARTICLES FROM THE ICON BLOG

FIND YOUR SOUND, HONE YOUR CRAFT:
Are you ready to turn music into a career? ICON prepares students to become music producers, composers, performers, recording artists, professional DJs, and entrepreneurs in the entertainment industry. Click below to get information about our award-winning programs: