This guide offers ten suggestive mixing techniques to help you mix your kick and bass. Learn how to achieve a professional sounding low-end that stacks up to commercial releases.

Kick and Bass Relationships
The kick and bass are among the two most essential elements in modern music – especially electronic music. Kick drums serve as the musical heartbeat that drives music. They are a fundamental element that guides the rhythm and sets the vibe. Bass is also a significant element that plays an integral part in the rhythmic vibe. Together, the kick and bass build a musical foundation that anchors the rhythm and propels the music.
The decisions you make while managing the low-end may make or break your song. Careful attention to kick and bass relationships are crucial in establishing a robust and professional sounding mix. However, getting the kick and bass to sit right in the mix can be challenging.
This guide offers ten suggestive mixing techniques that will help you to accomplish a clear and powerful foundation for your mix. Learn how to add punch, clarity, balance, and presence to your low-end with these tips:
1. Identifying the Problems
The most significant issue with kick and bass relationships is that they both dominate the same frequency ranges. Low frequencies carry much more energy than higher frequencies. A buildup of low frequencies or transients causes clarity issues, phasing problems, and headroom loss. In addition, an untreated low-end will cause your mix to lose punch, presence, and level. Furthermore, an unchecked low-end will also make a limiter work harder which could create unpleasant distortion. Put simply, masking or overlapping frequencies are problematic.
The goal is to shape the kick and bass so they can co-exist in the same frequency ranges without conflicting with each other or other elements in the mix. This challenge involves creating separation with equalization, dynamic control, metering, visual inspection of the waveforms, compression, effects processing, and using your ears.
2. Creating Separation
The low-end frequency range in modern music extends from 20-250 Hz . However, most of the low-end energy sits below 100 Hz . The sub bass frequencies occupy the 20-60 Hz range while the bass covers the 60-250 Hz range. As we know, overlapping low frequencies in this small amount of space causes several problems and reduces valuable headroom. Low-end separation is an effective way to combat most frequency masking problems. Below are a few different techniques used to get better separation between your kick and bass.
3. Identifying the Dominant Sound
It’s important to decide which element will sit lower in the mix, the kick or bass. One must give space to the other. Making this decision early in the project helps avoid problems later on. Traditionally, the sound with the deepest and most consistent amount of low frequencies often sits lower in the mix. For example, if you have a deep subby bass, try using a tight, punchy kick that sits higher in the frequency spectrum. However, if you have a big boomy kick, then it will serve better to either carve out frequencies in the bass to make room for the kick or use shorter notes that play higher in the spectrum. In either scenario, try to separate the two by making the more dominate sound sit lower in the mix.
4. Equalization
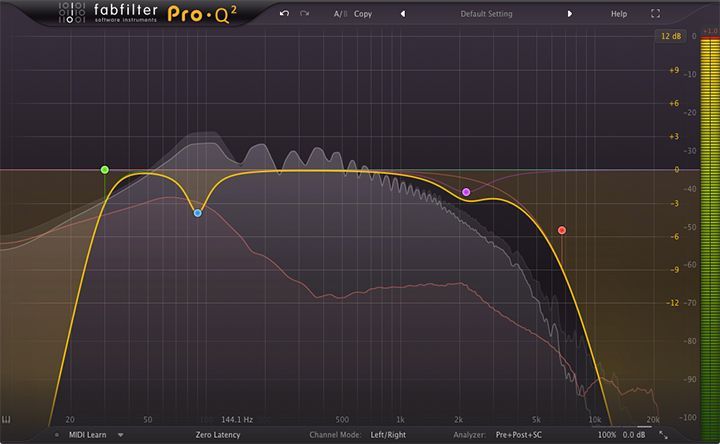
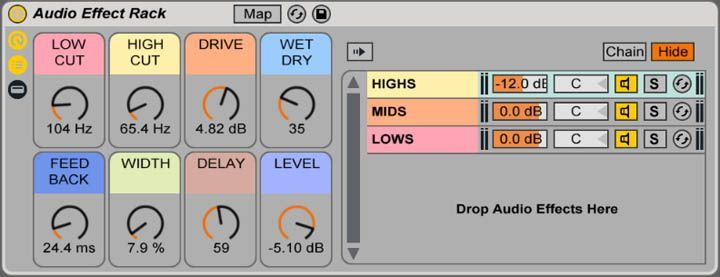
Using equalization to carve out frequencies is one of the most effective ways to create separation and increase clarity. A parametric EQ with a built-in analyzer like FabFilter’s Pro-Q 2 is an excellent choice for sculpting frequencies with precision. Below are a few suggestive EQ techniques to help you get starting at shaping your kick and bass.
Removing Unnecessary Frequencies
Cutting unnecessary sub frequencies from other instruments is a good place to start when trying to achieve a more defined low-end. Using a high pass filter, go through all of the elements in the mix and remove any sub frequencies that could conflict with the kick and bass.
In addition, if the kick or bass is generating useless rumble, then try cutting anywhere below 50 Hz to tighten up either sound. Conversely, if there is a lot of unnecessary or conflicting high-end energy, try cutting anywhere above 10 kHz with a low pass filter. You may be surprised how much louder the mix will sound after removing frequencies that don’t contribute to the sound.
Subtractive Equalization
Now that the kick and bass are the only instruments occupying the low-end, it’s time to get them playing nicely with each other. The EQ moves needed to create separation between the two depends on your source material. However, there are general frequency ranges that often cause problems. Using an analyzer and your ears focus in on some of the following troublesome areas.
If there is masking occurring between 50-100 Hz , try removing frequencies from whichever instrument you chose to sit higher on the spectrum to make room for the lower instrument. You can use either a high pass or low shelving filter. Where you cut depends on how much low-energy presence you want to remove.
Next, inspect the kick somewhere around 80 Hz and remove any frequencies that will help the bass cut through the mix. Similarly, try checking the bass between 100-300 Hz and remove frequencies as needed to increase the kick’s presence in the mix.
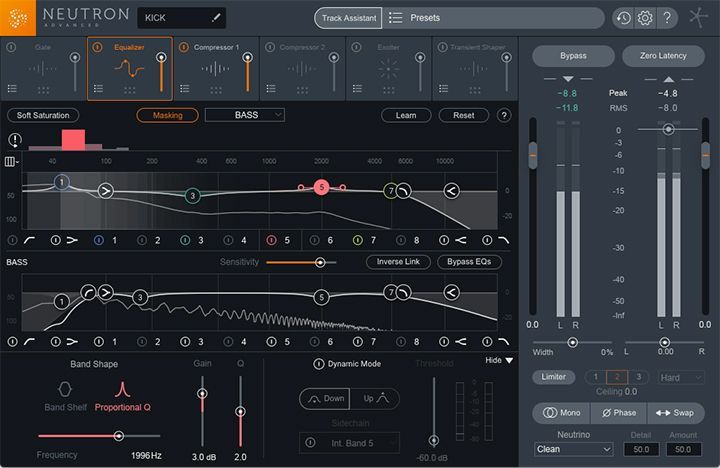
When EQing your kick and bass, visually inspect and listen to any areas where frequency masking may occur. Focus on both low and high-frequency ranges. For example, make sure there are not any bass overtones interfering with the kick’s attack or higher frequency instruments. Similarly, make sure there is not any high-frequency content from other instruments masking the kick’s attack. Sometimes these conflicting frequencies are difficult to hear. Fortunately, there are several plugins available that will allow you to visually inspect both waveforms from the same analyzer display. For example, iZotope’s Neutron 2 has an impressive Masking feature that identifies perceptual frequency conflicts between two tracks. You can also make EQ moves for two separate tracks simultaneity within the same plugin window.
Divide Frequencies
Once you have identified any problematic areas, carve out even more space to allow both elements to shine in the mix. Use an EQ to sweep the frequency spectrum of both the kick and bass to find the sweet spots. Boost a bell curve with a tight Q and listen for the fundamental tones, the most musical overtones, and where the attack of the kick drum sounds best. If you decide to boost any of these musical frequencies, then try making a slight cut to the same area on the other sound. This technique increases the dynamic range between the two sounds at that particular frequency range and will reduce frequency masking.
The goal is to bring out the best in each instrument and then carve space so those parts are heard more clearly. For example, if you boost a kick at 50 Hz to bring out the fundamental, then try cutting the bass at 50 Hz to improve the presence of the kick. Dividing the frequencies like this is an effective way to create separation while also shaping a more defined low-end.
5. Kick Tail Length
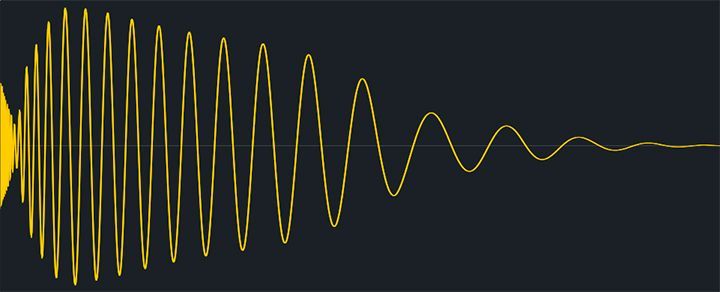
An often overlooked problem with kick and bass relationships is long kick decays. Long kick tails can cause interference with a groovy bassline. Tightening up your kicks will leave more space to work with other low-frequency content. For example, a shorter kick decay will free up space for longer or deeper bass notes and help reduce any low-frequency conflicts. Conversely, if your bass is playing shorter, spaced out notes, try using a longer kick that fills in the space. You can reduce the tail length of your kick with fades, volume automation or gating.
6. Arrangement
Sometimes the arrangement of your kick and bass can cause problems. If you’re still struggling to nail a fat and powerful low-end, then reevaluate the composition. Having a kick play at the same time as an 808 bass or a sub will make low-end management difficult. When all else fails, try changing up the bassline rhythm or swap out the kick. You can also try playing the kick or the bassline a fifth (+7 semitones) higher.
7. Sidechain Compression
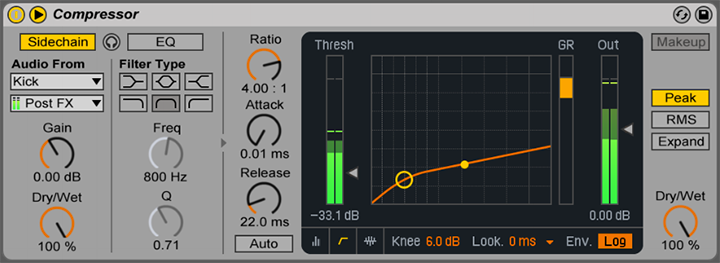
Since the kick is the main driving force of a track, it’s important to give it space to cut through the mix. There are several techniques that will achieve this. However, sidechain compression is the most common approach.
Sidechaining involves using a compressor that temporarily reduces the level of a sound. The compression is triggered by an external sound source, typically a kick drum or another percussive sound. For example, sidechaining the bass with the kick will quickly attenuate the bass level and make space every time the kick hits. This technique is achieved by loading a compressor on the bass track and choosing the kick as the external trigger source. Most DAWS have native compressor devices with sidechaining features.
Sidechaining is also highly effective at creating separation when the kick and bass patterns play at the same time. Sidechain compression also creates a rhythmic pumping effect which gives a sense of energy. This method allows the kick and bass to jive and interact with each other rhythmically. Alternately, there are more modern plugins like Xfer’s LFO Tool and Nicky Romero’s Kickstart that rhythmically change levels without routing audio.
8. Stereo Imaging
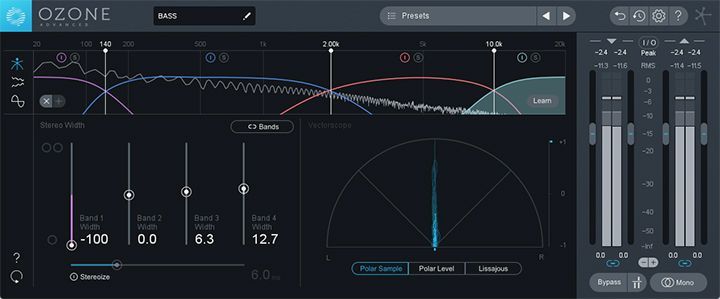
Placing your low frequencies centrally in the mix is extremely important. Kick and lower bass frequencies should always be in mono for several reasons. Keeping low frequencies in mono retains punch, helps avoid phasing issues, and allows the low-end to translate appropriately on mono speaker systems. In addition, low frequencies carry a lot of energy and will take up more space in a mix than higher frequencies. Centering them clears space for elements with stereo information.
9. Level Balance
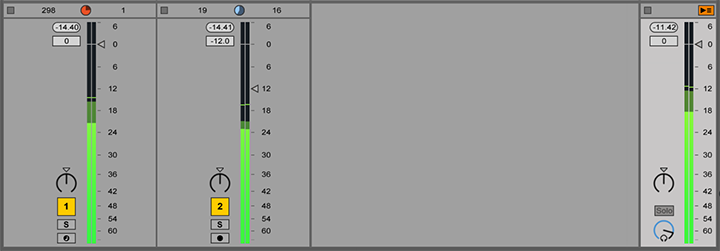
Now that your kick and bass are jiving along nicely, check the levels. Balance the volume levels against each other with the faders and then check levels in context with the rest of the mix. In addition, you can achieve a more balanced, cohesive mix by applying subtle bus compression. This move is optional, so apply compression as needed. Set up bus compression by routing the bass and kick to an aux channel loaded with your choice compressor.
10. Optional Processing
Balancing the kick and bass is a multistep process that may need additional processing once you have created separation and space. The following techniques offer a few optional methods to enhance the low-end further.
Multiband Compression
Sometimes the bass loses power and presence after EQing and applying sidechain compression. One way to bring back some energy is with multiband compression. Multiband compression separates the frequency spectrum into different sections or bands so that each has its own unique compression settings.
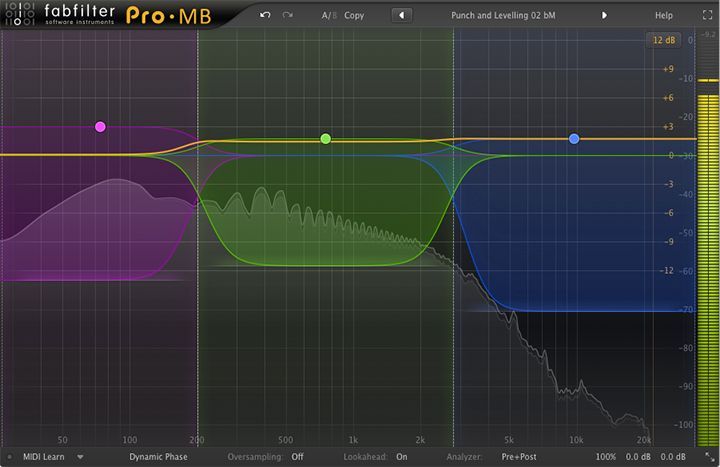
Multiband compressors such as Waves C6 or FabFilter’s PRO-MB are excellent tools that allow you to treat specific frequency ranges with precision. For example, if the bass loses energy in the low-mids, you can set a band around those frequencies and boost them. This technique brings back presence and energy while maintaining tonal consistency. Similarly, you can use multiband compression to bring out the kick if the bass is too overpowering. This method works great for giving the kick more punch. For example, set crossover points to separate the lows, mids, and highs. Compress the lows harder than the mids and highs to give the kick a consistent low-end and a more dynamic high-end that cuts through the mix.
Furthermore, multiband compression is often used as an alternative to traditional sidechain compression. This approach is more flexible because you can focus on attenuating only the low frequencies. As a result, the unaffected high frequencies will be more present which sounds better on smaller speakers.
Dynamic Equalization
Dynamic EQ’s are advanced equalizers that combine the precision of parametric equalization with the dynamic control of compression or expansion. This versatile combination gives you more control over shaping and enhancing sounds.

Dynamic EQing is an excellent alternative to sidechain compression and static reductive EQ as well. For example, cutting a notch in the bass to allow the kick to punch through the mix more clearly will affect the sound of the bass continuously throughout the song. You could automate the EQ filter to stop cutting the bass when the kick is not playing, or you can allow a dynamic EQ do the work for you. This is achieved by setting the specific frequency range you wish to cut from the bass and then using the kick as a sidechain trigger too quickly attenuate those frequencies from the bass whenever the kick plays.
Parallel Processing
Parallel processing is an excellent technique used to give your sounds more power and punch without affecting the original sound source. This type of processing is often applied either by an effects wet/dry mix control or by routing sounds to an auxiliary track with effects loaded. This technique allows you to mix a processed signal with the original signal to achieve a fuller sound. A few examples include parallel compression, parallel saturation, and parallel reverb. Learn more about how to use parallel processing in this Kick Drum Mixing Tips guide.

Turn your passion for music into a Profession: Learn more about our Music School Programs!
MORE ARTICLES FROM THE ICON BLOG


FIND YOUR SOUND, HONE YOUR CRAFT:
Are you ready to turn music into a career? ICON prepares students to become music producers, composers, performers, recording artists, professional DJs, and entrepreneurs in the entertainment industry. Click below to get information about our award-winning programs: