This beginner’s guide to audio compression looks at the fundamentals of dynamic compression and how to use a compressor.
What is Audio Compression?
Audio compression reduces the dynamic range of an audio signal. Dynamic range is the difference between the loudest and quietest parts of a waveform. Compression reduces this range by attenuating the louder signals and boosting the quieter signals. As a result, the loudest and softest parts are closer in volume, creating a more balanced sound. With the extra headroom, you can then increase the overall level of the signal. In short, audio compression gives you a controlled sound that’s louder and more present in the mix.
Why Use Compression?
Audio compression is one of the most fundamental processes in music production, mixing, and mastering. For example, use compression for creative sound design, corrective mixing, audio enhancement, audio repair, and as a safeguard to prevent clipping.
Compression also has several uses for various situations. For example:
- Increasing headroom
- Taming transient peaks
- Adding punch and presence
- Boosting perceived loudness
- Smoothing out sharp transients
- Shaping the envelope of a sound
- Repairing over-compressed audio
- Achieving consistent volume levels
- Adding color and sonic characteristics
- Ducking audio to make space for other sounds
- Preventing the signal from clipping or overloading
- Gluing or gelling sounds together to create a cohesive sound
There are also several ways to apply compression. For example, serial compression, parallel compression , multiband compression , sidechain compression , and bus compression.
Compressor Controls
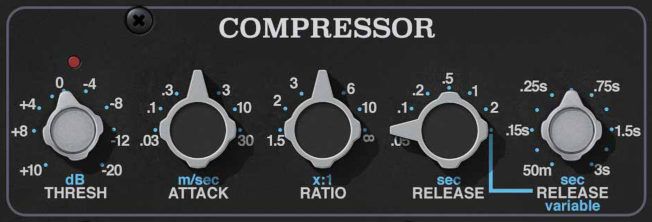
Careful adjustment of a compressor’s controls is essential. There’s a delicate balance between controlling dynamics to enhance an audio source and sucking the life out of it. Typical controls featured on a standard compressor include:
Threshold
The threshold control sets the dB level where the audio signal has to exceed for the compression to activate. Any signal that passes above the threshold gets compressed. Furthermore, a lower threshold will reduce a greater portion of the signal. Whereas, a higher threshold will reduce only the loudest peaks and leave the rest untouched.
Ratio
The ratio control sets the amount of gain reduction the compressor applies when the signal passes the threshold. For example, a ratio of 4:1 means that for every 4 dB the signal rises above the threshold, the compressor will increase the output by 1 dB. However, if the ratio is 1:1, no compression will occur. Whereas a ratio of 10:1 or higher will make the compressor effectively act as a limiter.
Attack
The attack control sets the time it takes for the compression to kick in once the signal passes the threshold. Faster attack times will immediately clamp down on the initial transients of a sound. This is good for controlling dynamics and catching transients that cause clipping. However, compressing too much of the attack transient can make a sound dull and lifeless. Whereas slower attack times allow more of the initial attack to punch through before compression begins. A slower attack time will help add punch and presence. However, slower attack times will also give you less control over taming peaks and maintaining consistent volume levels.
Release
The release control sets the time it takes for the compression to stop once the signal falls below the threshold. Faster release times sound more natural and transparent. However, setting the release too fast can cause a “pumping” effect and other unnatural sounds. Whereas longer release times are good for smoothing out dynamics. However, if the release is too slow, the compressor will not have time to recover before the next transient. The compressor must recover from gain reduction before it re-triggers, or it can suck the life out of a sound and reduce its impact.
Input Gain
Input gain controls the level of the signal going into the compressor. Decrease the input gain if the incoming signal is too hot. Or, increase the input gain if the incoming signal is too low to trigger compression.
Makeup Gain
Makeup gain controls the level of the signal leaving the compressor. Compression usually reduces the level of a signal. Use the makeup gain to bring the signal level back up after compression occurs. Or, turn the output level down if it’s clipping.
Knee
Knee adjusts how gradually or abruptly compression occurs as the signal approaches the threshold. For example, a “hard knee” setting of 0 dB will only apply full compression once the signal exceeds the threshold. With higher “soft knee” values, the compressor will compress gradually as the signal approaches the threshold.
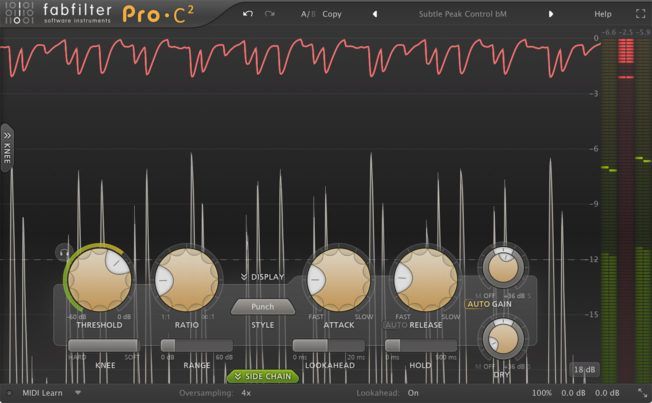
Gain Reduction Meter
This meter shows the amount of gain reduction happening at a given moment. This meter helps to see how much compression is occurring, especially when it’s hard to hear the effect. It can also help you determine how to adjust the output signal level.
Compression Modes
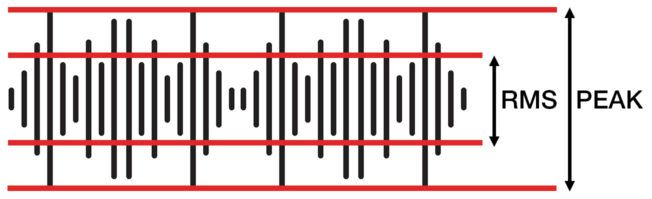
Many modern compressor plugins also offer two basic modes of operation: Peak and RMS.
Peak Mode
Peak mode reacts faster to short peaks within an audio signal. This mode is more aggressive and responsive to transients. It works great for taming transient spikes and limiting tasks.
RMS Mode
RMS mode is less sensitive to short peaks. This mode applies compression only when the incoming level exceeds the threshold for a slightly longer time. Many consider RMS as sounding “musical” and smooth. It’s also a more accurate measurement of perceived loudness.
How to Use a Compressor
There are no hard rules for using compression. There are also no perfect compressor settings since every sound is unique. However, there are general tips to help you find a starting point when setting up an audio compressor. When applying compression, try these basic compressor settings as a starting point:
- Start by setting the ratio to the highest value or inf:1.
- Set the threshold level to 0 dB.
- Set the attack and release controls to the fastest settings.
- Lower the threshold level until you see some gain reduction. It’s easier to hear the compression with -10 dB or more of gain reduction initially. Then back off the amount after adjusting the attack and release. A safe amount of gain reduction ranges between -3 dB and -6 dB.
- Slowly increase the attack until you have the desired punch and control over the peaking transients. Use your ears and meters. Ensure you’re controlling the dynamics without flattening the transient impact of the sound. Also, try preserving the initial attack to retain punch and presence.
- Adjust the release until the compression “breaths” rhythmically in time with the song. Also, ensure the gain reduction recovers back to 0 dB before the next transient hits. Long release times may not allow the compressor to recover before engaging again. The result is over-compression and loss of transient punch. Conversely, attack times which are too fast can cause an unnatural “pumping” effect.
- Increase the threshold level after adjusting the attack and release. Again, use your ears and meters. Listen for consistent volume levels, punchy attack transients, and a smooth release. Also, make sure no transient peaks are causing clipping or distortion.
- Lower the ratio amount until you have the desired compression effect. Common ratio settings for instruments, vocals, and bus groups range from 2:1 to 6:1. Whereas mastering compression ratios are lower around 1.5:1. The higher the ratio, the more aggressive the compression.
- Last, increase the makeup gain to compensate for the volume lost during compression. Use your ears and meters to level match the output and input levels. Balancing these levels makes it easier to hear how the compression is affecting the sound.
Note: Experiment with using dramatic compression settings at first to hear and understand what the compressor is doing to the audio. After training your ears, you’ll be able to set up the compressor with less aggressive settings.
Also, occasionally bypass the compressor while dialing in the settings. This method will help you hear how the compression is affecting the signal. And for more accurate results, avoid setting up the compressor in solo. It’s best to listen to the track in context with everything else in your mix playing to make informed decisions.
Last, it’s better to apply small amounts of compression in stages using multiple compressors. Avoid having one compressor do all the heavy work.
Compressor Circuit Types
The compressor you choose will also play a role in the overall sound of the effect. Compressors come in a wide variety of designs, flavors, and circuit types. The four most common circuit types found on both digital and hardware compressors are:
FET (Field Effect Transistor)

FET style compressors add punch and coloration. A FET compressor also has a fast attack and release response. Use a FET on sounds with more aggressive transients like drums, percussion, and guitars. An iconic FET compressor is the UREI 1176.
VCA (Voltage Controlled Amplitude)

VCA style compression is the most common and versatile type. A VCA compressor also has a fast attack and release response. However, the response and sound are more precise and transparent than a FET compressor. They excel at adding punch, cohesion, and clarity. Use a VCA on drums, bass, vocals, guitars, piano, and the mix bus. An iconic VCA compressor is the SSL G Bus Compressor.
OPTO (Optical)
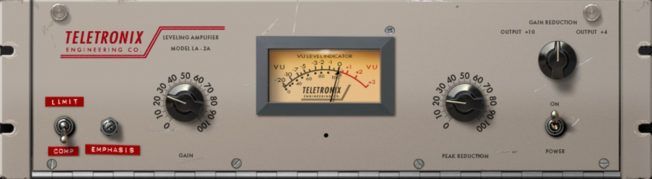
OPTO compressors have a smooth, natural, and musical sound. They also have a slow-acting attack and release response, which makes them less responsive to fast transients. Use an OPTO to smooth out bass, guitars, and vocals. An iconic OPTO compressor is the Teletronix LA-2A.
VARI-MU (Variable-MU)
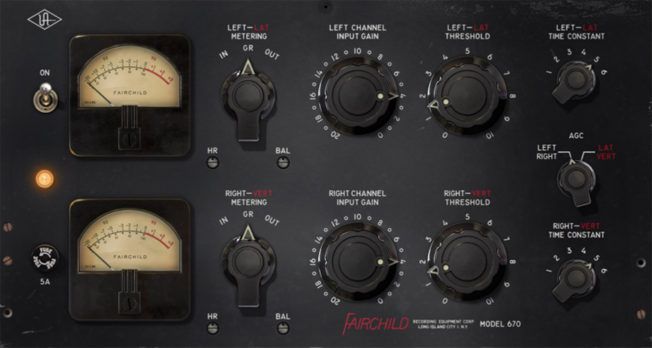
VARI-MU compressors are known for their slower response and coloration. They work great at “gluing” mixes, adding warmth, and boosting fatness. Use a VARI-MU compressor for mastering and bus mixing. An iconic VARI-MU compressor is the Fairchild 670.
Conclusion
Audio compression is one of the most misunderstood processes. Learning how to apply compression will help you achieve more polished mixes. However, the misuse of compression can make your mix sound flat and lifeless. It’s important to use compression with purpose. If you’re not sure how much compression to apply, think “less is more.” Also, remember to use your ears!

Turn your passion for music into a Profession: Learn more about our Music School Programs!
MORE ARTICLES FROM THE ICON BLOG


FIND YOUR SOUND, HONE YOUR CRAFT:
Are you ready to turn music into a career? ICON prepares students to become music producers, composers, performers, recording artists, professional DJs, and entrepreneurs in the entertainment industry. Click below to get information about our award-winning programs: